Chocolate Chip Banana Bread

This banana bread has been a go to recipe of mine for years. I used to make it frequently with a marscapone icing (that I will post another day if anyone is interested), but now I tend to make it in either muffin, or loaf format.  What makes this recipe so versatile is that it’s decadent enough to serve as a tasty dessert (I especially like serving it at lunch or brunch), but also healthy enough that you don’t feel too guilty about having a slice for breakfast on occasion.  The secret is extremely ripe bananas: I wait until they are too ripe for my family (ie, they are developing brown spots), then I let them sit out until they are almost completely brown and kind of squishy.  Because they are so overripe, these bananas are sweeter (and easier to mash).  I find that the best way to ensure that you always have these overripe, extra sweet bananas, is to peel them and pop them in a Ziploc bag in the freezer: this way they won’t go bad before you get a chance to use them, and you will have enough on hand when you randomly decide that you just have to have banana bread.  You can definitely freeze them unpeeled, but it is much more of a headache when you try and use them.  Bonus, this bread will freeze well in any format!

Ingredients:

3 Cups All Purpose Flour
1 Tsp Baking Soda
1 Tsp Salt
1/2 Tsp Baking Powder
1 Tsp Ground Cinnamon
1/2 Tsp Ground Nutmeg
1 Cup Brown Sugar (I buy dark brown)
1 Cups Chocolate Chips (I strongly recommend using semi sweet for this recipe: I like Bakers and Ghiradelli)
1 Cup Canola Oil (you can also use vegetable if you’d prefer) plus a bit extra to coat your dish if you are baking as a loaf
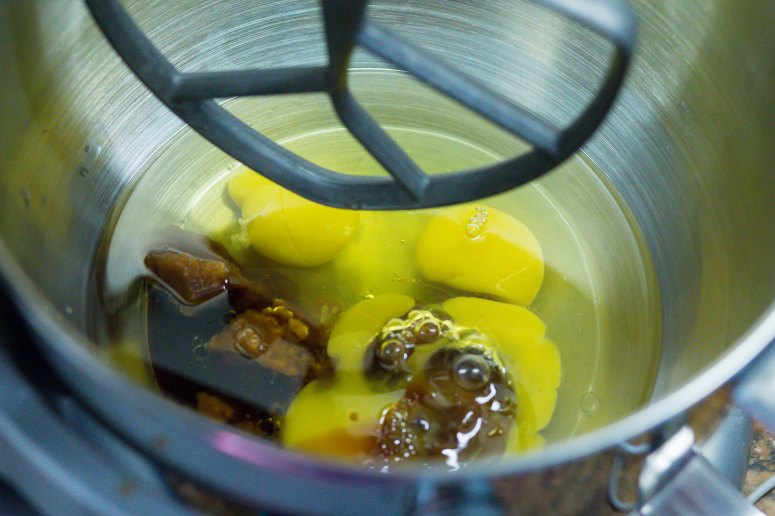
3 Large Eggs
1 Tbsp Vanilla Extract
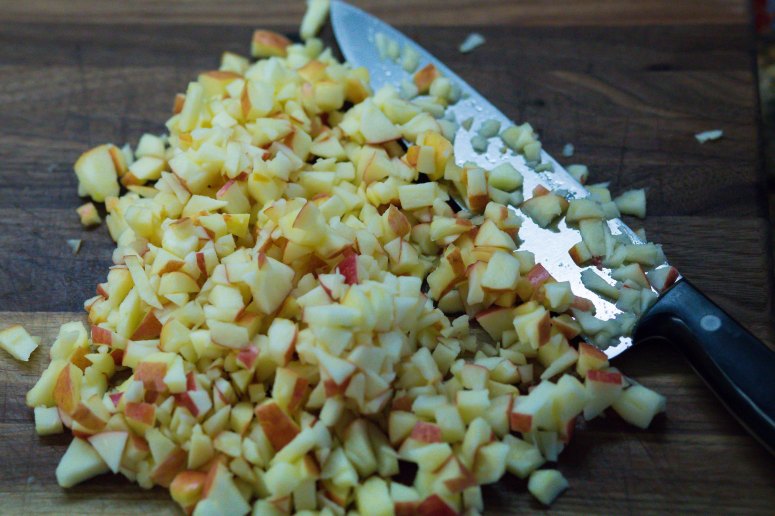
5 Ripe Bananas, peeled and coarsely mashed (I find it cathartic to use my hands for this)

Tools:

Muffin tray or baking dish (I like using my Le Creuset stoneware)
Muffin papers
Stand mixer (I am OBSESSED with my Kitchenaid Professional Mixer)
Extra bowl

Method:

Pre heat your oven to 325 F.  It will take quite a while to bake a large banana loaf, but do NOT turn up the heat to speed up the process: you’ll end up with a burnt bottom, and underdone center.

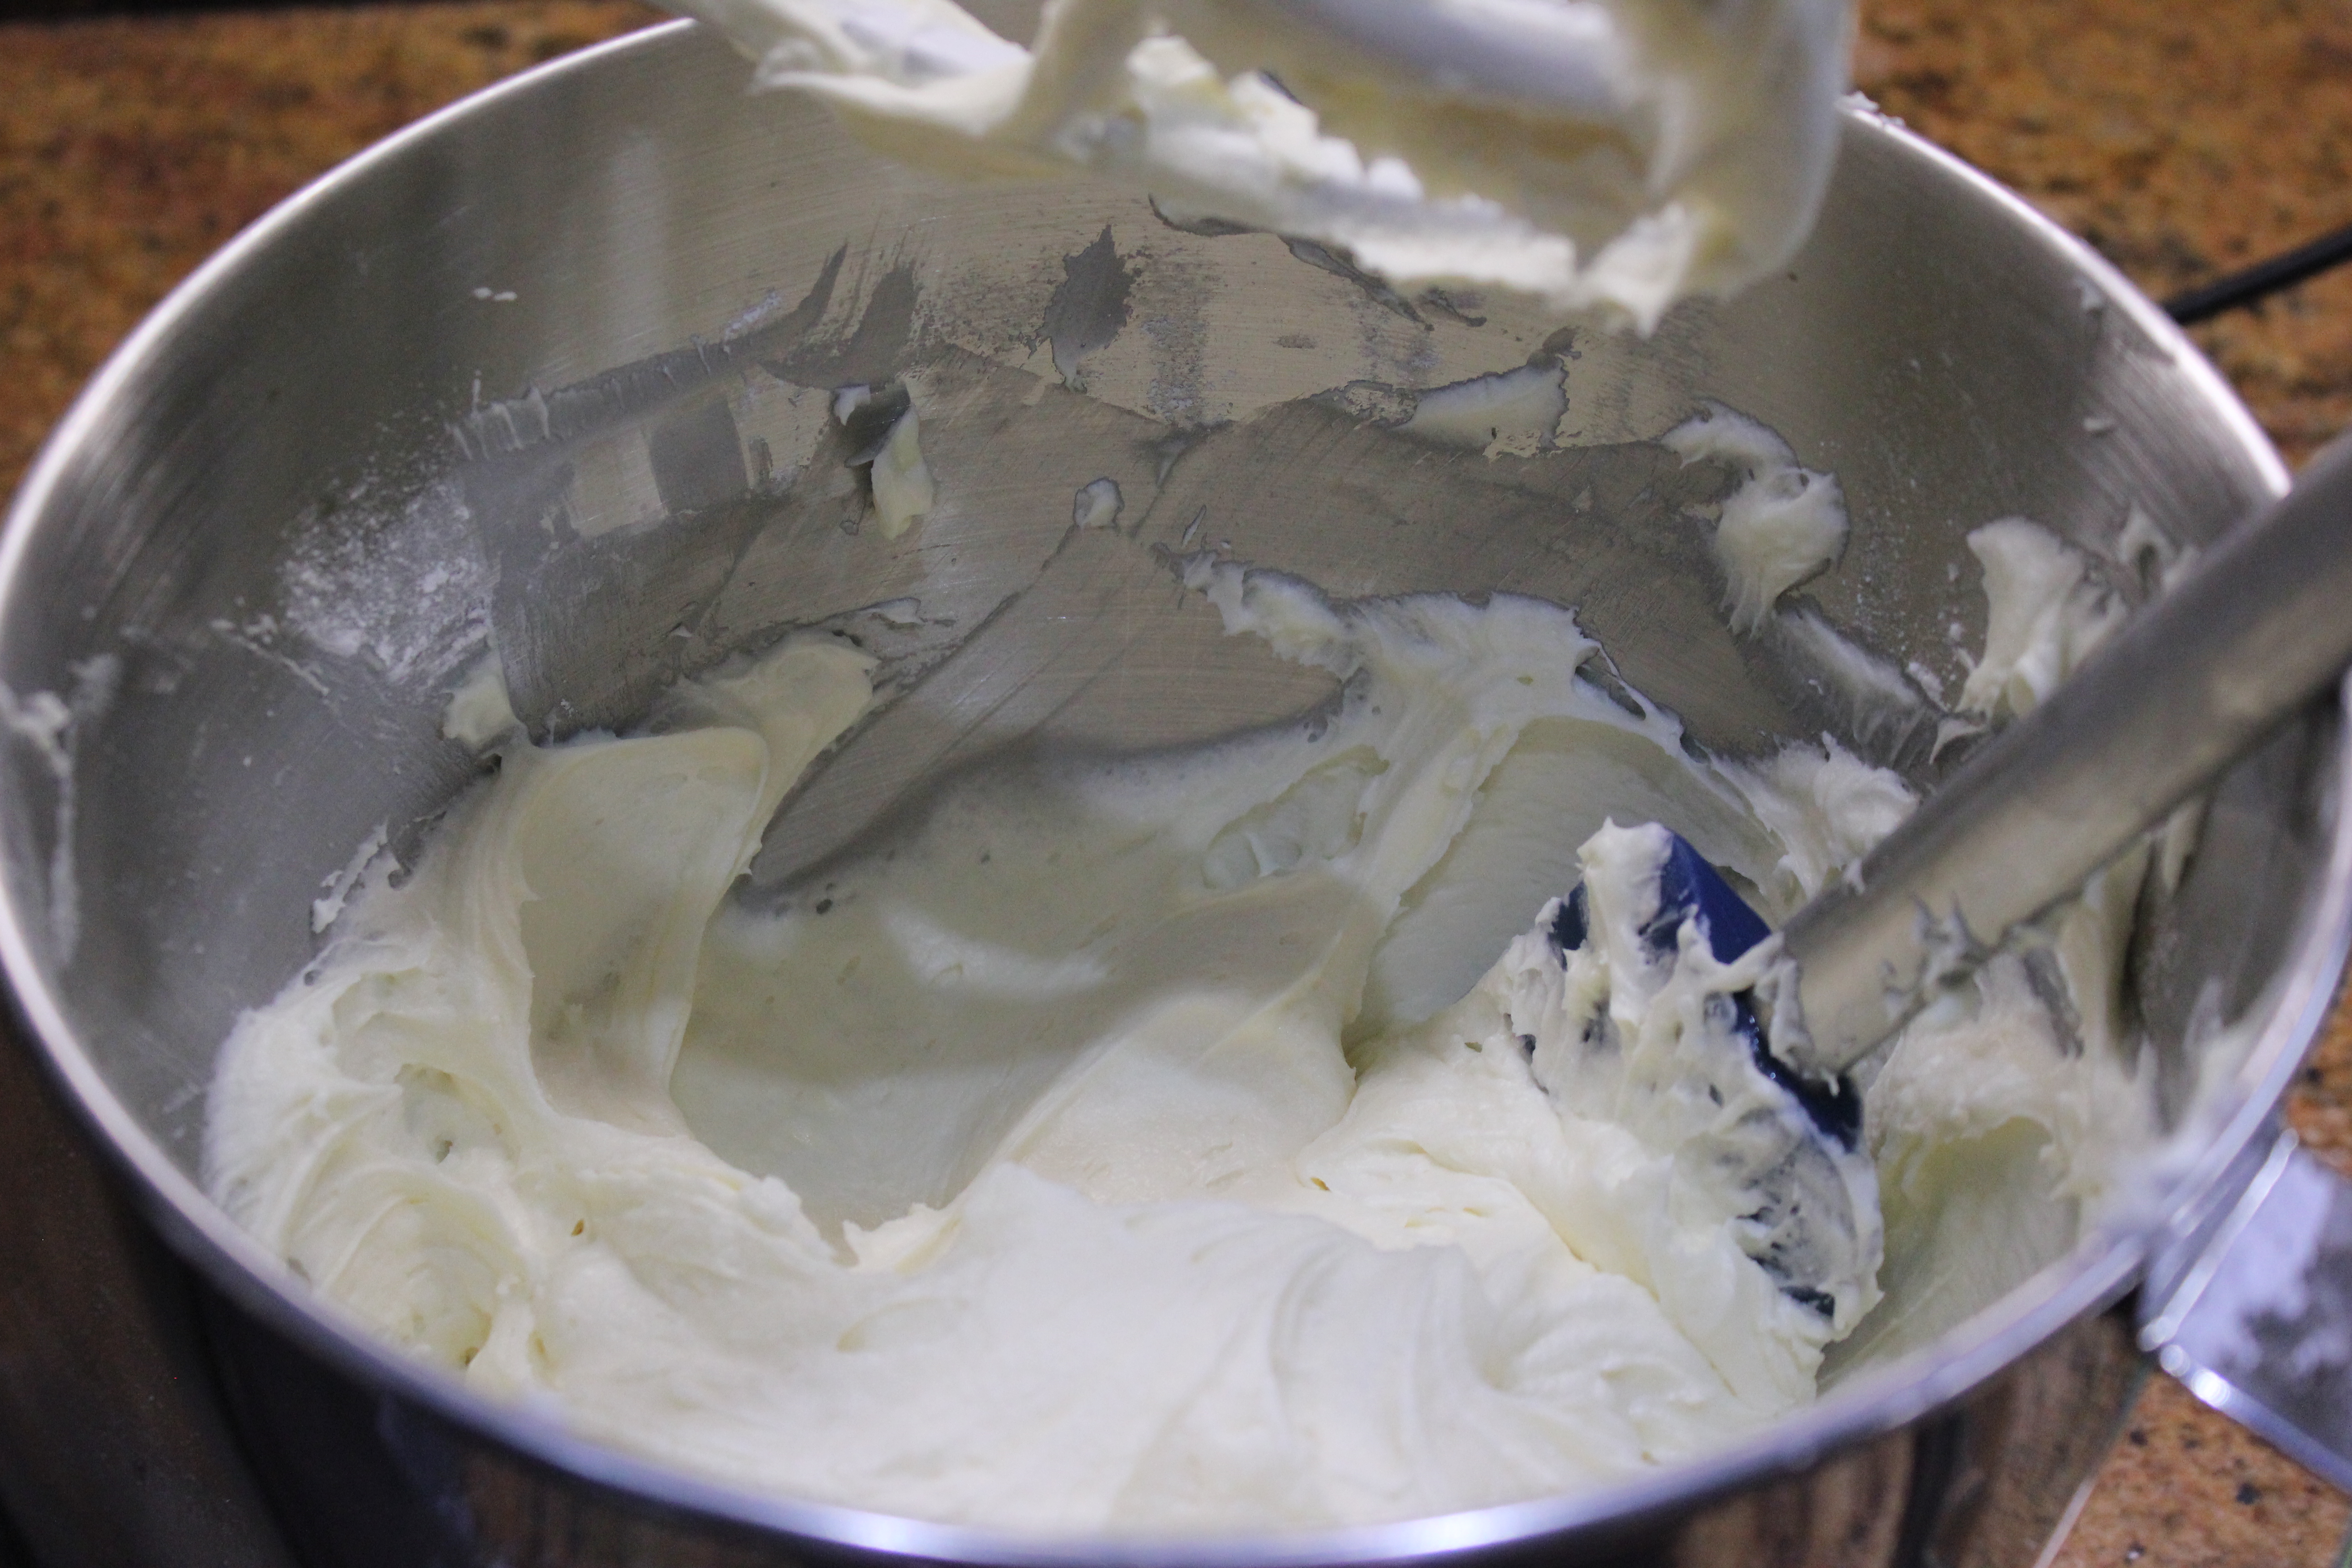
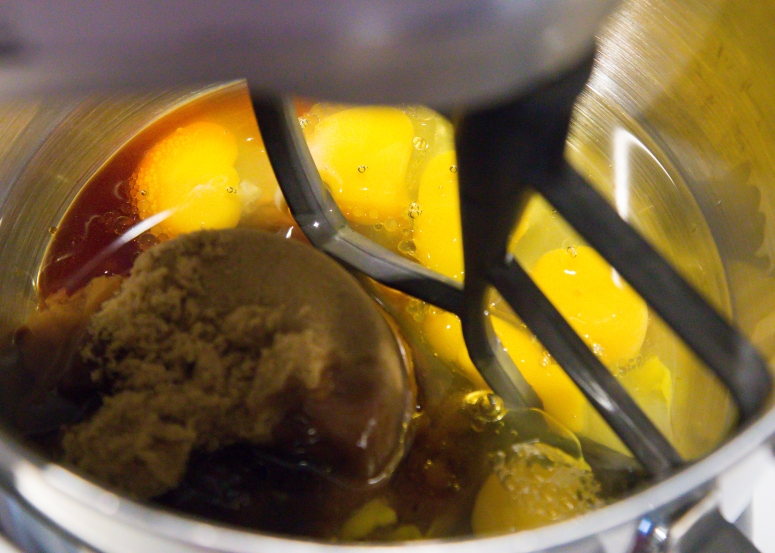
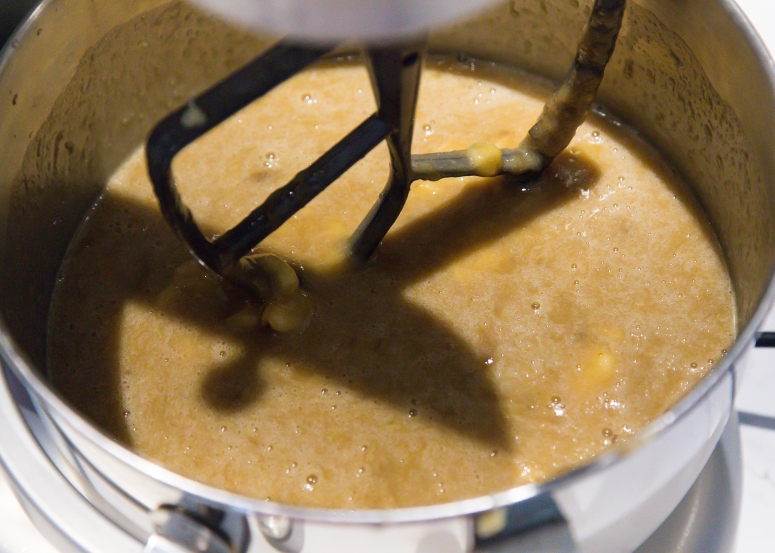
First, whisk the flour, baking soda, salt, baking powder, cinnamon, and nutmeg in a medium bowl to blend. Next, beat the sugar, oil, eggs, and vanilla in a large bowl in your stand mixer.


IMG_2551-2

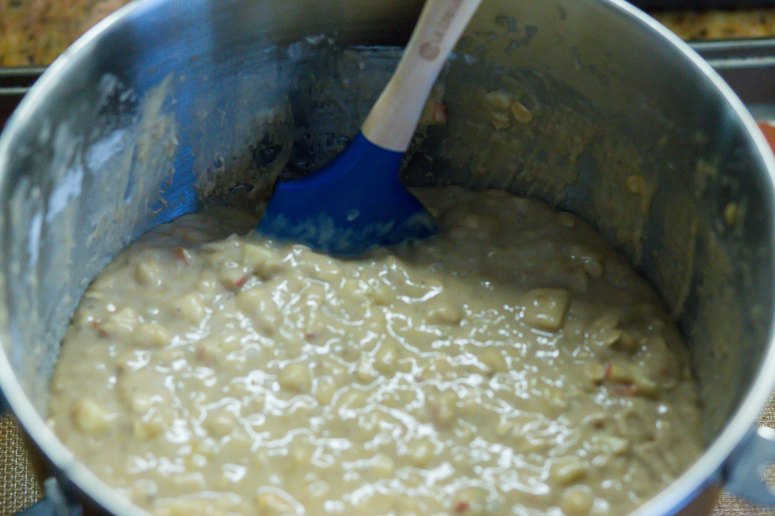
Once the mixture is creamy and smooth, add in your banana.

IMG_2554-3

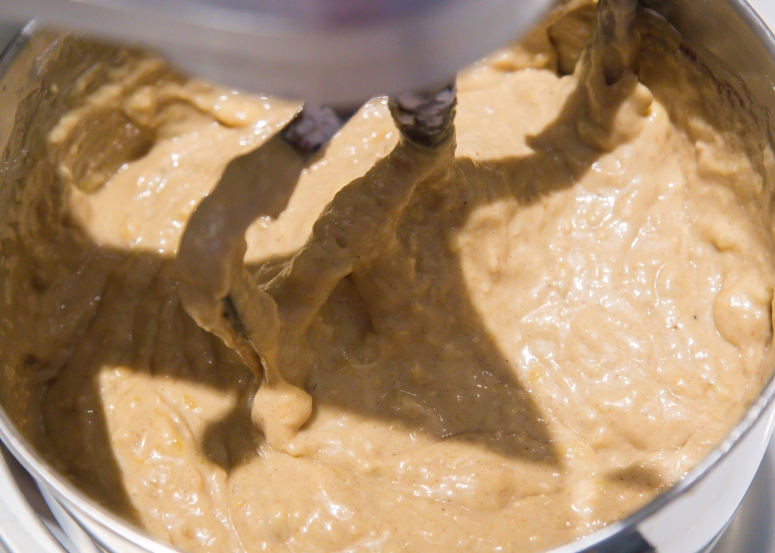
Add the dry ingredients and stir just until blended.  

IMG_2556-5

Some people would stop here, and you can, but I like to add chocolate chips to make it even more delicious.  Depending on your stand mixer, you may find it easier to fold in the chips by hand.  I have no issue with my Professional Series, but my Artisan used to shake a bit.

IMG_2557-6

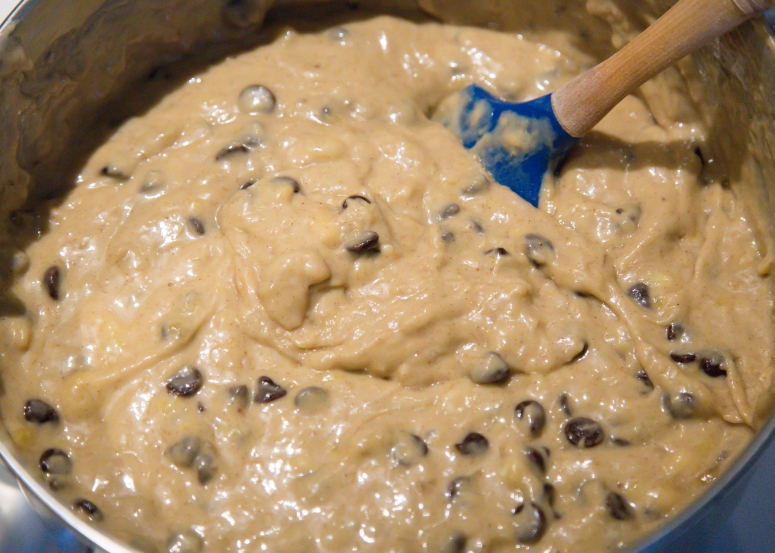
Make sure to scrape the sides of your bowl with a spatula.  The last thing you want when you pour the batter into muffin papers or a baking pan, is to find unmixed dry ingredients: it will affect the taste and consistency of your final product.

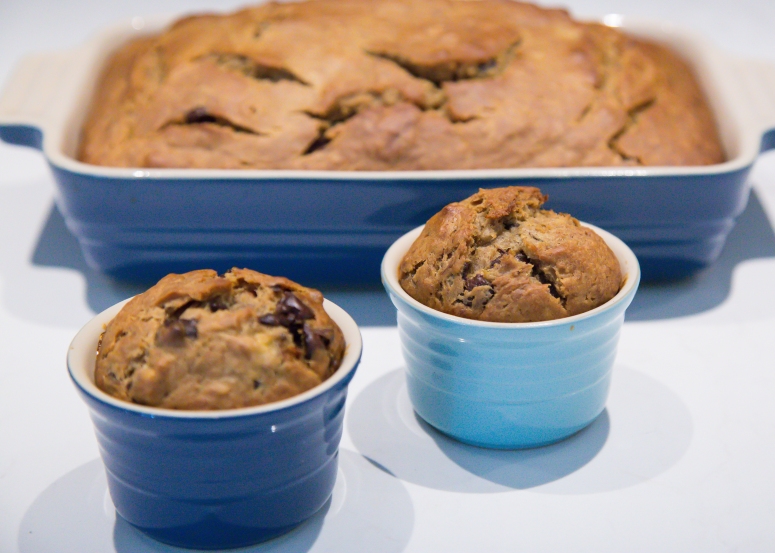
Bake your muffins for approximately 20 min; your loaf will take anywhere from 40 min to an hour, depending on it’s thickness.  Your banana bread is done when the top is slightly browned, and a toothpick inserted in the center comes out clean.  Underdone banana bread is extremely unappetizing: you’d rather a bit overdone than under, trust me.

IMG_2559-7

As always, I suggest eating chocolate desserts with a large glass of milk (but a coffee or tea is just as good!).

Enjoy!!

Banana, blueberry and apple oat muffins

After such a long hiatus since my last post, it seems only fitting that this is a recipe my almost 18 month old son loves as well. I’ve recently allowed him to try some of my baked goods and he loves them. I wanted to create a ‘healthier’ (ie, less sugar, more fruit and fiber) version of my banana muffins; a recipe I will eventually blog someday. I decided that adding oats, halving the sugar, and including two other fruits were the key. You could just as easily add in another berry/fruit to the mix, just keep your proportion of wet to dry in mind: no one likes a soggy muffin!  I also plan on taking these to work as an on the go breakfast for myself; what better way to start off your day than a delicious, and healthy, muffin?

Ingredients:

3 Cups All Purpose Flour
1 Tsp Baking Soda
1 Tsp Salt
1/2 Tsp Baking Powder
1 Tsp Ground Cinnamon
½ Tsp Nutmeg
1/2 Cup Brown Sugar
1 Cup Rolled Oats
1 Cup Vegetable Oil
3 Large Eggs
1 Tbsp Vanilla Extract
6 Ripe Bananas, peeled and coarsely mashed (you can freeze over ripe bananas, then use them later)
1/2 Pint Blueberries
3 Royal Gala Apples, diced

Tools:

Muffin tray
Muffin papers
Mixer
Extra bowl

Method:

Pre heat your oven to 325 F.

Beat your sugar, oil, eggs, and vanilla in a large bowl to blend.

IMG_7013-1

Next, add your pre mashed banana.  Dice your apples, peel on, nice and small then add them to your other ingredients.

IMG_7016-2

Whisk the flour, baking soda, salt, baking powder, oats, cinnamon, and nutmeg in a medium bowl to blend, then add your dry ingredients to your wet.  Finally, stir in your blueberries carefully to avoid mashing them.

IMG_7022-3
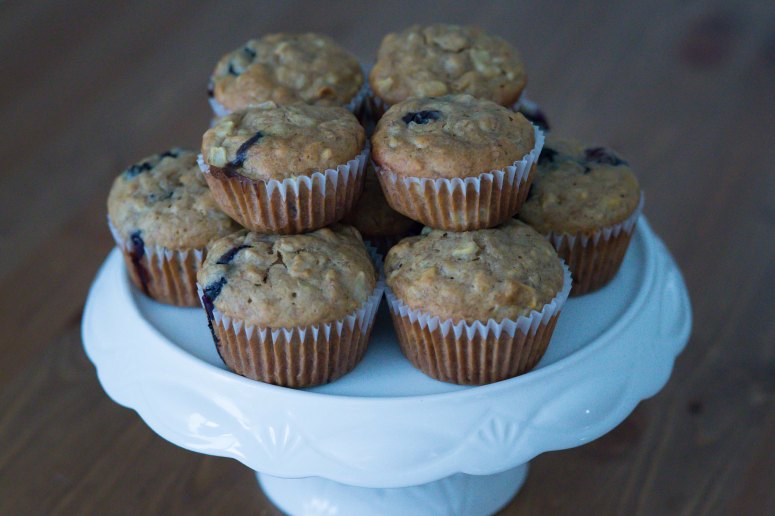
Divide the batter among the prepared muffin cups. Bake your muffins on the middle rack at 325 until the tops are golden brown and a tester inserted into the center comes out with no crumbs attached; about 25 minutes for medium and 30 for large muffins.

Enjoy!

IMG_7028-4

Soft chocolate cupcakes with cream cheese icing

I haven’t written a blog post in a long time, in fact this is only my second post since my wonderful son was born in early October.  Although I’ve still been baking and cooking up a storm, I just haven’t found the time or energy to write a post.  It seemed fitting that this be my first post in a long while as this cake is one of my mainstays.  It’s everything a chocolate cake should be, but often isn’t: moist, incredibly chocolatey, but not too sweet.  I’ve been making it for years and it’s become one of my husband’s favourites.  I make variations of this recipe, sometimes using chocolate milk or liquor (Khalua) in place of the coffee depending on who my audience is.  I’ve even added pureed raspberries to the mix which gave a delicious fresh fruitiness to the cake.  This cake is delicious with chocolate chips added, however they often sink to the bottom because it is so moist.  My favourite way to serve it is with my incredibly rich cream cheese icing (from my Moist Spiced Carrot Cake recipe).  I hope you enjoy it as much as we do!

2 cups all-purpose flour
2 cups sugar
3/4 cup unsweetened cocoa
2 tsp baking soda
1 tsp baking powder
1/2 tsp salt
2 eggs
1 cup cold brewed coffee
1 cup buttermilk (I just use a cup of milk and a tsp of lemon left to sit until it curdles)
1/2 cup vegetable oil
Kitchen mixer (or a large bowl and whisk)
Muffin pan
Muffin papers

First, preheat your oven to 350 F and line your muffin pan.  Sift together your dry ingredients then make a well in the center of your mix.

IMG_8517

Add your wet ingredients into the well in the center.

IMG_8518

Mix well.

IMG_8520

Pour your batter into the muffin papers, being careful to leave some space at the top: this recipe expands in the oven.

IMG_8522

Bake about 15 minutes, or until a toothpick comes out clean when inserted.  Transfer immediately to a cooling rack while you prepare your icing.

IMG_8523

1 lb cream cheese, room temperature
1 cup unsalted butter, room temperature
3 ½ cups icing sugar
1 tsp vanilla extract

Beat your cream cheese and butter on high until smooth then reduce the heat to low and slowly beat in the icing sugar and vanilla.  Add your icing sugar 1/2 cup at a time to avoid a mess.  Increase the speed to high and continue to beat until your icing is smooth and fluffy.

 IMG_8526

I was making these particular cupcakes for a birthday so I decided to colour the icing.  Whenever I colour any icing I use Wilton gel food colouring; you only need a few drops and it doesn’t thin out the icing.  I always add the colouring after the icing is finished, adding a little more until the desired effect is reached.  I’m definitely not a cake decorator and value taste over aesthetic, but it is nice to see a little swirl of colourful icing on top of a yummy cupcake.

The final result!

IMG_8527

Creamy seafood chowder and oregano biscuits

This past August, my husband and I traveled to Prince Edward Island to celebrate the wedding of my best friend and her husband.  We were lucky enough to get a few extra days off work, giving us the opportunity to travel around the province a little before heading back home.  Aside from the beautiful landscape and charming people, we experienced an abundance of fresh seafood prepared in a variety of delicious ways.  One of the dishes PEI is known for is their seafood chowder, and after one bowl we were hooked (in fact, my husband requested this for his birthday dinner).  My best friend’s Aunt has her own delicious version and, although I didn’t use her recipe, I was inspired by her advice: when using delicious seafood, who needs potatoes?  There are many recipes of this dish online: mine is inspired by them and utilizes our favourite seafood selections.  If you choose, you could use different fish or remove/add another type of seafood to add your own spin on the chowder.  This is a very versatile recipe so be creative and have fun!

6 cups stock (I used chicken, but a pescetarian could substitute vegetable)
3/4 onion, diced
2 carrots, chopped into 1 cm chunks
2 stalks of celery, chopped into 1 cm chunks
1/2 lb salmon, cut into bite sized pieces
1/2 lb scallops, cut in half lengthwise
1 lb shrimp, peeled and deveined (I purchased frozen shrimp and defrosted them)
1 lobster tail, chopped into bite sized pieces
Bag of mussels (I believe the bag was approximately 2 lbs)
2 cups heavy cream
1 1/2 cups ‘half n half ‘cream
1 cup butter, cut into 1 inch chunks
Salt, to taste
Pepper, to taste
Large pasta pot

Add your stock to the pot and bring it to a boil.  Add your chopped onions, carrots and celery and cook until the vegetables are tender; about twenty minutes.

IMG_8607

Next, add your seafood (minus the mussels) to the pot.

IMG_8610

Turn down the heat to medium and cook until your salmon is firm but slightly translucent in the middle; about ten minutes.

IMG_8616

Next, add your mussels and both kinds of cream.  Finally, top off with the chunks of butter and season with salt and pepper.  Cover your chowder and let it simmer, stirring occasionally, until your fish is fully cooked; about twenty minutes.

IMG_8617

While your chowder is simmering, pre heat your oven to 425 F and prepare your delicious fluffy biscuits.

2 cups AP flour, plus extra for rolling and cutting your biscuits
1 tbsp baking powder
1 tsp salt
1/2 tsp onion powder
1 tsp dried oregano
1 tbsp white sugar
1/2 cup butter, cold
1 cup milk
Large glass or biscuit cutter
Baking tray
Parchment or Silpat mat

In a large bowl, whisk together your dry ingredients.  Next, grate your cold butter into the dry ingredients and mix with your fingers until the mixture resembles a course meal.  Add your milk and stir until the dough comes together and pulls away from the sides of your bowl.

IMG_8603

Knead your dough (either by hand or with your mixer) until it has fully come together in a smooth ball.  Turn your dough out onto a floured board and roll it out to 1 inch thick.  Dip your glass rim into flour then use it to cut circles out of your dough.  Continue, reusing the extra, until all the dough is used.  Lay your biscuits onto your baking sheet.

.IMG_8604

Bake your biscuits for 13-15 minutes; until golden brown and fluffy.

IMG_8606

Serve your biscuits fresh out of the oven with a large bowl of hot chowder.  Enjoy!

IMG_8620

Raspberry chocolate ripple cheesecake

I made this cake for my Mother’s birthday by combining three of my favourite things: cheesecake, chocolate and raspberries.  The basic recipe for the cheesecake is my Mom’s: she’s been making it since I was a child and I’ve always loved it.  I changed it up a little bit when I started making it a few years ago: instead of the usual graham crust, I make mine a bit spicier with ginger snaps, cinnamon and nutmeg.  I decided to add fresh fruit to the cake because it’s summer and it seemed appropriate, but you could just as easily switch it up or omit the fruit all together (the way my Mom normally makes it).  The final touch is the chocolate ripple, it’s a very easy technique that I’ve been helping with since I was little but it makes your cheesecake look beautiful and taste delicious.
2 cups ginger snap cookie crumbs (I like ShaSha Co. brand cookies when I can’t find a traditional Swedish brand)
1/2 cup brown sugar
2 tsp cinnamon
1/2 cup melted butter
3 packages of Philadelphia cream cheese, room temperature
1 cup sugar
4 eggs
1 tsp vanilla essence
1 tsp almond essence
3/4 pint raspberries
2 ounces semi sweet chocolate
Sauce pot
Stove safe bowl
Spring form pan
Baking pan
Food processor

First, pulse your cookies in the food processor until they are fine crumbs.  If you don’t have a processor, you can always place the cookies in a ziploc bag and roll over them with a heavy rolling pin.  Mix your cookie crumbs in a bowl with the butter, brown sugar and cinnamon until thoroughly combined then press into your spring form pan.  Refrigerate while you prepare the cheesecake filling.

IMG_8072

Next, beat the cream cheese until smooth then add your sugar, eggs, vanilla and almond.  Continue to beat until there are no lumps, scraping the sides occasionally.

IMG_8074

Rinse your raspberries and carefully fold them into your cake mixture.

IMG_8079

Pour your cheese cake filling over your prepared crust and set aside.  Preheat your oven to 325 F.  Melt your chocolate over a bain marie (half fill your sauce pan with water and bring to a boil with the stove safe bowl on top).  Once your chocolate is melted and silky, drizzle over your cheesecake.

IMG_8080

Using a butter knife, carefully draw an abstract design through the chocolate and cake: as much or as little as you’d like.  The key to a beautiful cake is a light hand; you want to just barely break the surface of your cake with the tip of your knife.  Once your design is finished, place your spring form on a baking tray to catch any cake drippings.

IMG_8082

Bake your cake for 70-75 minutes until firm, then cool on a wire rack until room temperature.  Chill in the fridge until ready to serve.

Enjoy!

.IMG_8093


Flourless double chocolate cookies

I came up with this recipe for a friend who is intolerant to gluten.  My husband and I were hosting some friends for a bbq and I decided that ice cream sandwiches were the perfect easy to eat summer dessert.  I made a double batch of my chewy cookies, half chocolate chip and half cinnamon sugar (blogged in my earlier post “The BEST chocolate chip cookies”) and wanted to make something my friend could eat as well.  I searched the internet for flourless cookie recipes and found that most either showcase peanut butter (to which my brother, who was attending, is highly allergic) or an incredible amount of sugar.  It was almost as though the chocolate cookie recipes I found simply substituted the quantity of flour that would normally be used with icing sugar.  Given that these cookies are flourless they need something to bind together the batter; adding more sugar is simply not the answer.  Several recipes mentioned the addition of cornstarch which reminded me of my Pesach macaroons (to which I add potato starch).  Adding the starch helps these cookies to stay together and creates a beautiful cracked top similar to that found on a good brownie.  This recipe could be easily adapted for Pesach by substituting potato starch for corn starch and ensuring the rest of your ingredients are Pareve.

2 1/2 cups icing sugar
3/4 cup cocoa powder
1/4 tsp salt
1 tbsp cornstarch
2 egg whites
1 egg
1 tbsp vanilla extract
1 cup semi sweet chocolate chips
Mixing bowl or Kitchen Aid mixer
Cookie scoop
Baking sheet
Silpat or parchment paper

First, preheat your oven to 350 F then sift together your dry ingredients until well blended.  Press through any clumps to ensure even blending: this cookie is all about texture.

IMG_8050

Add your egg whites, egg and vanilla and mix until thoroughly combined.  The mixture will be very gooey, don’t worry.

IMG_8052

Finally, fold in your chocolate chips by hand.

IMG_8053

Drop by the tablespoon onto parchment or Silpat baking sheets.  Leave several inches between each cookie to allow for spreading.  Bake for 15-18 minutes until the tops crack and appear dull.  This batter is extremely sticky and will adhere even with a Silpat so gently remove them from your baking sheet as soon as they come out of the oven and transfer immediately to a wire rack.

IMG_8054

Enjoy with a large glass of milk!

IMG_8063

Caramelized peach upside down cake

I recently offered to bake for a friend’s baby shower.  When I asked her what dessert she’d like me to make, she replied that she had been craving fruity pastries instead of chocolate.  I decided to make this cake because it’s deceptively straightforward despite looking impressive.  Even though peaches weren’t exactly in season when I made this cake, the process of caramelization brings out the sweetness of the fruit.  In fact, slightly under ripe peaches are ideal for this recipe as they hold their shape better in the pan.  You have the option of blanching and peeling the peaches before slicing, but I prefer the look of them whole.  If you are making this cake for someone with a nut allergy, you have the option of substituting additional vanilla extract for the almond.  I prefer the taste of almonds with the peaches but it’s your choice.

½ cup unsalted butter, at room temperature, plus more for the pan
1 1/2 cups sugar
5 peaches, pitted and cut into 6 wedges each
1 1/2 cups all-purpose flour
2 teaspoons baking powder
1/2 teaspoon salt
2 large eggs
1 Tsp vanilla extract
2 Tsp almond extract (or 1 tsp extract, 1 tsp Almond Cream liquor)
3/4 cup milk
Spring form pan
Baking pan

Preheat the oven to 350 degrees F and lightly butter your spring form.  Melt 1 tablespoon of butter in a medium skillet over medium heat then add 3/4 cup sugar and 1 tablespoon water and cook, stirring occasionally, until smooth and deep golden brown, approximately 8 to 11 minutes.  Remove your mixture from the heat as soon as it caramelizes.

IMG_7943

Pour the mixture into the prepared pan and tilt to coat the bottom.

IMG_7948

Arrange the peach wedges snugly in the bottom of the pan in a single layer, cutting to fit if needed.  I like to start at the outside with the peaches facing in one direction, then move inside, turning them to the other direction for aesthetic effect.

IMG_7949

Next, combine your flour, baking powder and salt and set aside.  Beat the remaining 7 tablespoons butter and 3/4 cup sugar in a large bowl with a mixer on medium-high speed until light and fluffy.  Add your eggs, one at a time, beating well after each addition then beat in the vanilla and almond extracts. Finally, beat in the flour mixture in 3 batches; alternating with the milk and beginning and ending with the flour mixture.  Beat in each addition until just incorporated.

IMG_7950

Spread the batter evenly in the prepared pan and bake with a pan underneath in case of drips.  Bake until golden, and a toothpick inserted into the center comes out clean, about 45 minutes.

IMG_7954

Transfer to a rack and let cool for 30 minutes then invert onto a plate and let cool completely.

Enjoy!

IMG_7964

Spicy mustard chicken with zuchinni and orzo

This chicken marinade was, like many dishes I come up with, borne out of necessity due to lack of standard ingredients.  I regularly make my chicken marinade with olive oil, balsamic vinegar and seasoning; but I realized too late that I was out of my beloved vinegar.  I don’t especially like the taste of chicken with lemon, so I was forced to find another acid to balance out my lovely olive oil.  I was introduced to Inglehoffer mustard by a friend who used it as a dip for appetizers, and became hooked immediately.  It is spicy and a bit creamy: very different from your regular deli mustard.  If you don’t have this particular mustard any spicy version will do, but I highly recommend picking up a bottle.

1 lb chicken breast, skinned and deboned
4 tbsp olive oil
Salt, to taste
1 tbsp mustard (my favourite is Inglehoffer Sweet Hot Pepper Mustard, found in the deli section of your grocery store)
1 tsp garlic powder
1/4 tsp chilli powder
1/2 tsp dried oregano

Mix your marinade ingredients thoroughly.  It will be more of a paste and less of a liquid: don’t worry, it will still flavour your chicken beautifully.

IMG_7932

Spread the marinade over your chicken and set aside in the fridge until ready to barbeque.

IMG_7869

2 zucchini, cut in half lengthwise
Olive oil
Salt, to taste
Pepper, to taste
Onion powder, to taste
Pastry brush

Brush over your zucchini and barbeque.

1 cup orzo pasta
3 cups chicken stock (I used homemade but you could also use Campbells if you’d prefer)
Salt, to taste
1/2 cup Parmesan, grated
1/2 tsp garlic powder
1/4 tsp dried basil
Pepper, to taste
Pasta pot

If you are using a homemade stock from a roasted chicken carcass, a pinch of salt is all that is required.  Heat your stock until it boils then add your pasta and cook to 1 minute less than al-dente.  Drain your pasta and set aside.

IMG_7142

Barbeque your chicken at medium high heat until browned on both sides and thoroughly cooked.  When pierced, only clear juices should run out.  The marinade will caramelize and leave your chicken a blackened colour, don’t worry it’s not burnt.  Remove the chicken from the heat and allow it to rest for a few minutes before serving.

IMG_7936

Finally, pour your pasta back into the pot and mix with the grated Parmesan and seasoning, mix until thoroughly combined then serve immediately with your chicken.


Enjoy!

IMG_7871


Baked farfale and mushroom casserole

This is a variation of a comfort food dish my mother used to make when I was younger.  She would use loads of yellow cheddar and bake the whole mixture until it browned and bubbled.  Cheese and pasta are two of my favourite things so combining them in a dish is like comfort food heaven.  I decided to make this dish a bit more complex by using mushrooms as well as several kinds of cheese instead of just cheddar.  I added ricotta because of the creaminess it adds to baked pasta dishes; ensuring they stay moist and delicious in the oven.  Although ricotta is delicious, it has a mild flavour which is nicely balanced by the sharpness of the old cheddar.  Finally, I finished it all off with a salty favourite, parmesan.

7-8 large Crimini mushrooms, thickly sliced (they will shrink when baked and you still want some texture)
2 1/2 cups grated cheddar (I like using white old or extra old for added flavour)
Box of farfale pasta (these are shaped like little bow ties.  I buy Barrila)
1 cup ricotta
3 garlic cloves, roughly chopped
1 1/2 cups marinara (I used my homemade recipe from earlier posts)
Parmesan, grated to taste
Salt, to taste
Pepper, to taste
Dried basil, to taste
Chili flakes, to taste

Cook your pasta for 2 minutes less than al dente: you want it slightly undercooked so it doesn’t get mushy when baked.  Once your pasta is fully cooked, drain and pour back in the pot.

IMG_7919

Spoon a bit of marinara onto the bottom of your baking dish, spread to ensure the bottom is covered.

IMG_7921

Next, add the remaining marinara to your pasta and mix.  Grate your cheddar and set aside.  Reserve 1/2 cup of cheddar, and add the rest to the pasta along with your ricotta, garlic, salt and pepper.  Taste, and add more salt or pepper as needed, add your mushrooms and mix well.  Pour your pasta mixture into the baking pan and spread to ensure it is even.  Sprinkle the remaining cheddar over your pasta and grate some fresh parmesan over the top.  Add your dried basil and chili flakes then cover with aluminum foil.

IMG_7922

Preheat your oven to 400F and bake for 30 minutes.  Finally, remove the foil and finish your pasta for 10 minutes at 425 F until browned.

IMG_7929

Enjoy with a fresh salad 🙂

IMG_7931

Garlic lemon salmon with green beans and couscous

This is the first barbeque post on my blog.  Unlike many couples, I’m the one that barbeque’s.  I love cooking, so why not cook on the giant outdoor grill we have available in the summer?  We use a propane grill but I would imagine any of my dishes would work just as well with charcoal, just adjust the time accordingly.  This meal, as with many I make, came about when I opened my fridge with no idea about what to make for dinner.  I had fish and green beans, but no starch.  I could, theoretically, have made fish and green beans alone but I always feel that something is missing in a meal without starch.  I decided to make couscous simply because I hadn’t made it in some time and it’s a favourite in our home.  The lemon and garlic marinade was also an afterthought, I was out of balsamic vinegar and needed a good acid to balance out the extra virgin olive oil; lemon seemed very summery and appropriate.

4 tbsp olive oil
1 tbsp lemon juice
1/2 tsp Sriracha
1 tsp garlic powder
Dash of chilli flakes
Salt, to taste

Mix your marinade and pour over your salmon in a sealed container.  Leave at least 3o minutes to marinate.

IMG_7858

4 cloves garlic, sliced lengthwise
Salt, to taste
Pepper, to taste
Dash of chilli powder
Evoo

Trim then cook your green beans until done but still crunchy.  Drain and lay out on foil.  Season and seal the foil package.

IMG_7859

Make the couscous the same as my earlier recipe, Roasted chicken with Israeli couscous and mushrooms.  Once the couscous is nicely cooked, pour onto some foil and fold the edges to make a dish.

IMG_7860

Preheat your barbeque at medium high, I had mine around 500 degrees.

Cook your fish skin down to prevent sticking and place your foil packages on the grill.  Barbeque until your fish is cooked through; your couscous and green beans will be nicely cooked at that point.

IMG_7864IMG_7862

Drizzle a bit of olive oil over your couscous and serve immediately.  Yum 🙂

IMG_7867